Hoofdsponsor

1/350 HMS Dreadnought (1/350 van Zvezda) [WIP]

Dank Steven... óók niet aan gedacht. Heerlijk zo'n community. Ook de Revell contacta is 0,91 mm.

@Marc: dat is een goeie... er bestaan kennelijk 0,6mm. naalden. Ik ga eens kijken of ik die snel kan bemachtigen.

Dank beiden!
 
Het zijn de naalden geworden. Ene apotheek deed moeilijk, 'leveringsproblemen' terwijl ze eerst gewoon op voorraad zouden zijn... misschien waren ze bang dat ik de naalden ergens anders voor zou gebruiken.

Dan de volgende apotheek, die had een heel setje op voorraad liggen en ik kon ze zonder inschrijving of recept of wat dan ook op komen halen. Ik heb nu een hoeveelheid naalden waar de gemiddelde junk klamme balletjes* van krijgt en dat voor 1 euro 70.

Meteen even getest natuurlijk, en met wat bijvijlen van het loopje (uitboren van de injectienaald lukt helaas niet) past het precies. Ideaal! Nogmaals dank Marc voor de doorslaggevende tip.

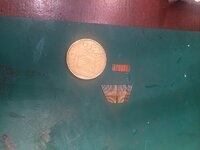
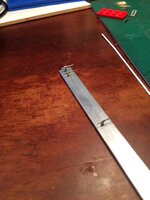
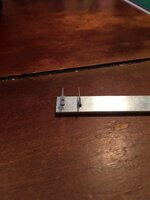
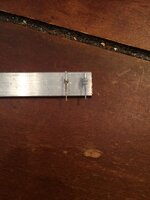
Binnenkort dan een tweede kans voor de bouw van deze kanonnetjes. Eigenlijk vormen ze een soort mini-bouwpakketjes op zichzelf nu, met 21 onderdelen op 0,5x0,5 cm. Ik heb ook een nieuw ondergrondje gekocht omdat de plasticard te beweeglijk was. U-profiel bij de praxis.

Nu gaat het leuk worden, want het wordt veel preciezer en concreter bouwen zo!


*Het betreft een referentie naar een Italiaans pastagerecht, voor de goede orde! Wat denken jullie wel niet ;)
 
Samenvatting van het onderstaande: nieuw stappenplan, nieuw onderdeel voor de loop (injectienaald, dank aan Marc voor het idee), extra onderdeel (afvuurmechanisme, #24), nieuwe tekeningen.

Voor de geïnteresseerden heb ik de oorspronkelijke Engelse teksten bij de foto's laten staan. Heb je ergens een vraag over, schroom niet hem te stellen! Voor een toelichting waarom ik dit topic in het Engels schrijf, zie hier.

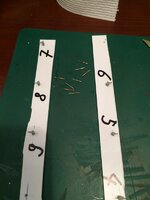
201. Turned out I wasn't satisfied with the way the guns looked. Modelers who know me are aware that I sometimes take things apart again and retry. In this case, the barrels were slightly tilted while they shouldn't be (though nicely aligned relatively to each other), aft end of the barrels took a lot of time carving and the end results were not spectacular (thought that wasn't so important as they'd have been largely covered up, but still..), the barrels each had slightly different heights... and also the base was too flexible (plasticard). All in all I just didn't like it. So I took off the barrels.
19899252725_579432687d_c.jpg

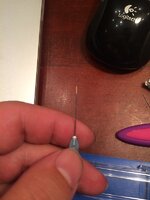
202. I spent hours and hours trying to figure out what would be the best way to add a piece of 0,6mm. copper wire to the Pontos 0,6mm. (at its widest) barrel. Glues were tested, soldering was tested... (actually the soldering had a pretty good result and I was going to use it... but... ) in the end I got a really good advice: try an injection needle. And indeed they are featured in 0,6mm. diameter. Cool! Was already planning to go purchase a copper tube 0,6mm. (Albion Alloys produces them) but the injection needles work and save money on price and gasoline. 12 needles for about 1 pound... nice deal. What can I say.. if you are ever in a situation in which you intend to connect a Pontos brass barrel to an extension, visit your local pharmacy.

Unfortunately the needle hole cannot be drilled (at least not by hand and I don't have the appropriate drill bit for my power tool) but when putting Pontos' barrel in the multitool the 'male connection point' can be easily filed to fit the needle. I'll show that in a video later.

This is the result (don't pay attention to the broken off Pontos barrel, I have a couple of spares):
19989665411_60ea423dc4_c.jpg

203. The problem with glueing two pieces of copper wire (or brass & copper) together is that they break off fairly easy... it's not a strong connection. Using the needle radically changes this, as can be seen in this vid: https://flic.kr/p/wakP7y

I used Medium Zap here (the green bottle). I'm amazed by the strength of this connection. No way is there ever going to be so much pressure on this barrel, but it's good to know it would hold.

204. Cutting away most of the plastic Zvezda part (in the end only using the base) calls for a longer recoil spring box to be made. I'll use 0,4mm. copper wire for that. Problem with copper wire is that it bends so easily (this also being an advantage, often!). There's a very easy way to straighten it, if you have the right tool: see this video. It's really a matter of 5 seconds before the copper wire will be (almost) perfectly straight. The demonstration is done on some 0,6mm. copper wire, but the method applies to any thickness. Listen to the sound... you can actually hear the straightening process going on.

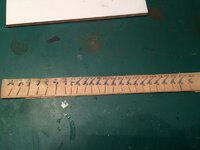
205. Making sure, after so much testing, I still have enough raw materials to start this job! 24 cannons needed, still available: 24 (!) plastic parts, 27 turned barrels. Good, now let's hope I don't make any mistakes. Knowing my frequent charming mistakes, that sure needs to be a strong hope...

By the way I taped all these small parts to some tape on the used plasticard base.
19984380645_00a10533cb_c.jpg

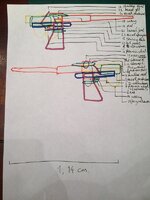
206. Revised plan. In this plan I make reference to parts as seen in my drawing, hereunder. Although references are made until part '24', there are only 22 different parts in one cannon: there's no '1' or '2'.

SECTION 1: BASE
1a. Cut off barrel aft (part '22').
1b. File barrel male connector (part '21').
1c. Glue barrel parts together (part '21' and part '22').
2a. Make, file and straighten recoil spring box (part '23').
2b. Glue recoil spring box to barrel.
3a. Chop off top half of plastic (part '20').
3b. File recess for recoil spring box from square plastic strip (part '25').
3c. Cut off square plastic strip (part '25').
4a. Drill holes in aluminum base.
4b. Glue plastic base ('25') into aluminum base, using fin as reference for front/aft.
4c. Glue part '25' to base.
4c. Glue barrel to '25'.
4d. Remove fin from base (part '20).

SECTION 2: RECOIL SHIELDS
3. Add recoil spring box underneath barrel.
4a. Left side gun recoil shield: cut.
4b. Left side gun recoil shield: curve and add.
5a. Right side gun recoil shield: cut rectangle (see #163).
5b. Curve rectangle and add to gun (see #163-#166).

SECTION 3: SIDE EXTENSIONS
6. Make training rack using 'eyebrow method' and add.
7a. Cut left side rectangle (#168 ).
7b. Fold left side rectangle (Z-structure) and add (#168 ).
8a. Cut U-structure right side.
8b. Fold U-structure right side (#172).
8c. Cut and bend photoetched layer wheel right side.
8d. Add layer wheel.

SECTION 4: WIRING
9. Add left side layer's shoulder rest (copper wire).
10. Add right side trainer's shoulder rest (copper wire).
11. Add 2,26mm. copper wire (rod) to right side.
12a. Add part 1 wiring to gun (starting left back side). (See #175)
12b. Add part 2 wiring to gun.

SECTION 5: SIGHTING GEAR
13a. Cut to shape photo etch sighting gear standard (see #157).
13b. Bend photo etch sighting gear standard (see #157).
13c. Using a jig like in #158, add two sighting gears made from copper wire.
13d. Add sighting gear to gun.
14. Make and add sighting gear wheel (see #159).

SECTION 6: ELEVATION
DEPENDING ON 12 POUNDER GUN POSITION ON THE SHIP, EITHER MAKE LEFT SIDE 12 INCH GUN CONNECTION (VERSION B ), OR MAKE VERSION A:
15a. Cut rod for left side elevator wheel.
15b. Bend photoetched elevator wheel.
15c. Glue rod to elevator wheel.
15d. Add elevator wheel to Z-structure.

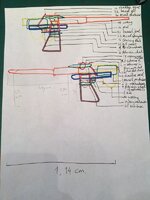
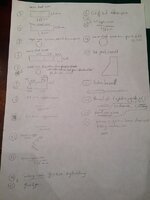
207. Here's the updated drawing, having been added parts '20'-'24'. For a detailed look, click the picture and in Flickr choose 'original size' or 'large size'.
19984380665_cde2f366d6_c.jpg

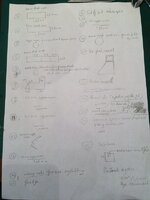
208. The several parts and their positions, schematically:
19796332078_244d9e09f2_c.jpg

Let the works begin once more!!

Spent time thus far: 151 h.
 
Laatst bewerkt:
De afgelopen weken heb ik zeker niet stil gezeten, maar omdat er tot op heden weinig visueel resultaat is leek het me nog niet veel zin hebben om een uitgebreide inhoudelijke post te schrijven.

Het voorlopige resultaat wil ik wel met jullie delen: 24 kanonloopjes, elk bestaande uit 3 onderdelen (staal, messing en koper):

20160896274_78aba75df4_b.jpg

Ik kreeg ze niet allemaal netjes uitgelijnd neergelegd (binnen 3 minuten), maar ga er maar vanuit dat ze allemaal behoorlijk recht zijn. Dit werk kostte ongeveer 14 uur schat ik.

Binnenkort meer.
 
Laatst bewerkt:
Eindelijk nog eens nieuws en nog positief ook nog na al de tegenslagen
Marc
 
Brrrr....een klein, fijn en geduldig werkje ;)

Zier er goed uit !
 
@Marc: inderdaad positief, ik ben blij met hoe het er nu uit ziet. Het is een behoorlijke verbetering t.o.v. het origineel en door de wijze van vervaardiging lukt het om ze daadwerkelijk allemaal nagenoeg hetzelfde eruit te laten zien.

Wel komt er nog een onderdeeltje bij, maar dat wordt later wel duidelijk. Er wordt nog meer van de Zvezda-basis afgehaald.

@Filip: merci! Geduld wordt eenvoudiger als je tot de conclusie komt dat niets (ooit) af moet :)
 
Samenvatting van het onderstaande: de stappen 1 en 2 van het bouwplan voor de kanonnen zijn doorlopen en worden besproken.

Voor de geïnteresseerden heb ik de oorspronkelijke Engelse teksten bij de foto's laten staan. Heb je ergens een vraag over, schroom niet hem te stellen! Voor een toelichting waarom ik dit topic in het Engels schrijf, zie hier.

207. These steps are being dealt in this post:

1a. Cut off barrel aft (part '22').
1b. File barrel male connector (part '21').
1c. Glue barrel parts together (part '21' and part '22').
2a. Make, file and straighten recoil spring box (part '23').
2b. Glue recoil spring box to barrel.

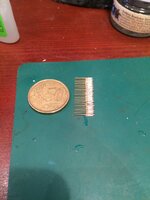
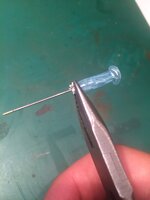
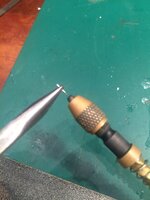
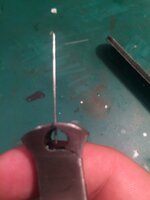
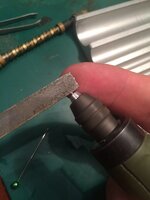
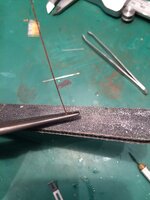
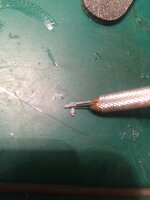
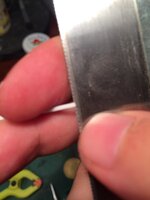
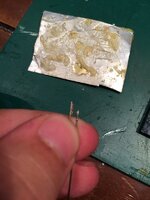
This 0,6mm needle was purchased in the local pharmacy. They cost a few cents each. First thing to do is to crush the white stuff.

20633342810_52037c51e6_c.jpg

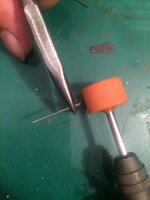
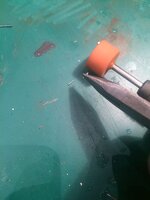
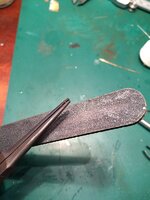
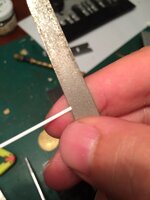
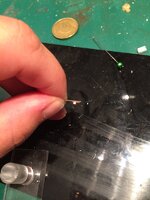
208. The end is flattened by means of a power tool.

20633405118_7e3cec6603_c.jpg

209. Then on to the other end. A lot of checking and verifying has to be done to ensure not too much is grinded off. For every specimen (24x) only one reference example is used. That is the key to their similarity.

20198792194_df2171f243_c.jpg

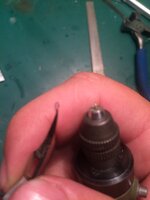
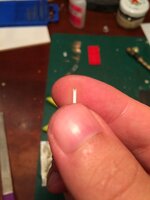
210. After both sides are flattened and leveled and if the needle parts are all of similar length, the openings are redrilled.

20795100486_315c58d46c_c.jpg

211. After quite a bit of testing, this appears to be the best way to cut a new part (after leveling one side):

20828456651_b77afaf6d7_c.jpg

212. By the way, any flash is removed by a file.

20828468561_5681833b66_c.jpg

213. All 24 are ready. Again, checking and verifying is being done and mistakes are repaired. In my case, one part had to be binned and replaced.

20828450141_d81154c9f0_c.jpg

214. All brass barrels (from Pontos) need to be filed. This is pretty easy, but it's important that you don't go to far to prevent the attachment point to break off.

20821399355_a1c4a13380_c.jpg

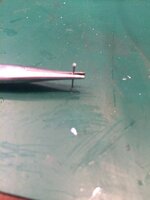
215. The needle bit is added to the barrel using a bit of medium Zap while the barrel is positioned in the power tool. This way, it's easy to turn the barrel and notice if the needle bit is wrongly aligned. Corrections are possible during a few seconds.

20633346370_0869c93e41_c.jpg

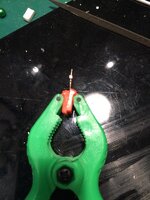
216. An artery clamp can be used to let the barrel dry.

20828466301_0cd8a3c21b_c.jpg

217. Ready!

20633348950_9503a855a3_c.jpg

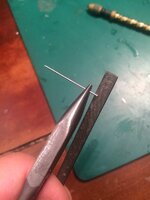
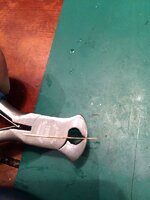
218. Next I needed 0,4mm. copper wire. Best to first level one end by sanding (here can be seen how I straightened the wire[/url].

20198790584_03f1e9f8b5_c.jpg

221. Cutting...

20811899802_3239084b1c_c.jpg

220. After cutting, the other side is equally dealt with. Grabbing the tiny bit with pliers...

20828458851_3ac472a8ab_c.jpg

221. Ready! Every part had to be straightened using this method.

20821391935_c082361ae6_c.jpg

222. Adding the copper to the barrel combination again uses one individual example all the time. Using clamps, a little bit of Gator Glue (not Gator Grip) is applied...

20198790134_9fc6fe7b06_c.jpg

223. ... after which the copper wire is put in place. Lots of correction time, Gator Glue is a great glue for purposes like these.

20200405613_96e9acac1d_c.jpg

224. Correcting the alignment, using a knife or a finger!

20200402153_91efdf0610_c.jpg

225. Approximately 14 hours of work results in 24 ready cannon barrels:

20160896274_78aba75df4_c.jpg

Spent time thus far: 165 h.
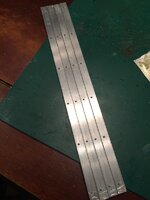
 
Samenvatting van het onderstaande: stap 3c van het bouwplan voor de kanonnen.

Voor de geïnteresseerden heb ik de oorspronkelijke Engelse teksten bij de foto's laten staan. Heb je ergens een vraag over, schroom niet hem te stellen! Voor een toelichting waarom ik dit topic in het Engels schrijf, zie hier.

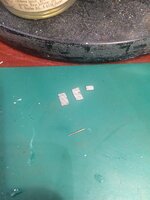
226. To make the base for the cannons, first the top halves had to be chopped off.

20906677475_0d33231ab2_c.jpg

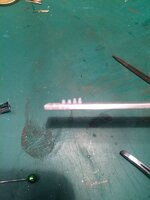
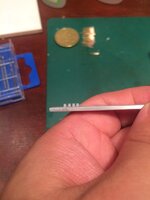
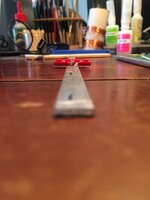
227. Two bases were sanded to exactly the height necessary. They were fitted (Zap thin) in a strip of aluminum in which I had drilled 4 holes. They're templates. Because of the one-of-a-kind shape of the parts they needed to be aligned in a precise way. I used the fin as reference for front/aft.

After installment of the templates, two more parts were chopped off and positioned...

20719931239_1a63267f80_c.jpg

228. ... and sanded. After that they were removed and replaced by two new parts, etc.

20913983681_12cfcf805f_c.jpg

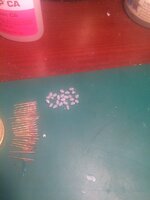
229. In the end what you're left with somehow resembles a can of maggots. Step 3c ready!

20880407536_830105fb4a_c.jpg

Spent time thus far: 169 h.
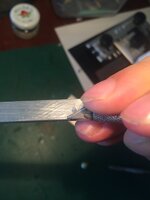
 
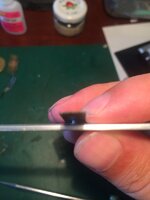
Samenvatting van het onderstaande: de bases worden bevestigd met Gator Glue aan op maat gemaakte en voorgeboorde stukjes aluminiumplaat. Als alles vast zit, kunnen de gietnaadjes worden verwijderd met een mesje. De gietnaadjes waren ontzettend handig bij het uitlijnen (ze gaven precies de voor- en achterzijde van een basis aan) maar zijn nu niet meer nodig.
Voor de geïnteresseerden heb ik de oorspronkelijke Engelse teksten bij de foto's laten staan. Heb je ergens een vraag over, schroom niet hem te stellen! Voor een toelichting waarom ik dit topic in het Engels schrijf, zie hier.

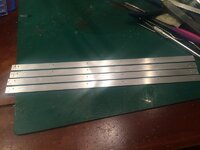
230. 4 strips of thick aluminium were cut by saw. Then, 1,2mm. holes were drilled at distance 1cm-5cm-5cm-5cm-5cm-5cm.

20927935006_295730799f_c.jpg

231. Sanding away the flash provides for 4 platforms for the 24 cannons.

20766122950_423b21ac8d_c.jpg

232. The attachment points of the 24 bases were all freed from Zap and pre-fitted into their respective holes. Once that was dealt with, a drop of Gator Glue was pushed into a hole, making a slight 'corona' of glue along the outline of the hole, plus providing grip for the attachment point of the base. When any 'corona' was not perfect, another drop was slid in. The tiniest bit of glue suffices.

Gator Glue slightly extends when drying, which quality is used here.

20961608011_e63c781570_c.jpg

233. Here all bases have been fitted to their platforms.

20961610211_5ff2d5c700_c.jpg

234. The fin left over from the moulding process is removed from the bases. It came in extremely handy to help align the base to the aluminium platform, but now that's done it has become useless.

20766124540_f5555db93c_c.jpg

235. Finally, all bases were flattened by sanding, once more. Some were slightly askew, others were a fraction too high.

20766230368_c1cdf123a6_c.jpg

Now we have 24 bases nicely aligned on 4 platforms, ready to be built upon.

Spent time thus far: 172 h.
 
Hoewel ik nog maar van één exemplaar één van de zes secties klaar heb, wilde ik dat toch even laten zien.

Boetseren van het witte onderdeeltje is lastig, maar als het dan lukt.... zelf ben ik eindelijk tevreden over het resultaat. Inmiddels zitten 5 van de 25 onderdelen in elkaar. Bont gezelschap van materialen: messing, koper, staal, hard plastic en zacht plastic.

20794864970_03f38757d6_c.jpg

Poging om het verschil te laten zien met het Zvezda-origineel. Wordt niet echt duidelijk, betere foto zal voor later zijn.

20956689396_aa08f859c4_c.jpg

Stappenplan volgt later.
 
Zoals beloofd, de betere foto:

20997234302_78a2e8040c_c.jpg

5 van de 25 onderdeeltjes zijn hierin verwerkt. Merk op hoeveel langer het nieuwe kanon is t.o.v. het oude, en hoeveel smaller de loop is.

Een plateautje van 6 kanonnen is inmiddels zover afgewerkt. Valt me niet tegen, en het werk is ook niet zó moeilijk als ik tevoren vreesde. Al doende leert men..

Stappenplan volgt, zoals gezegd, later.
 
prachtig hoeveel werk je erin steekt
 
Mijn petje af voor je geduld met dit gepriegel op de vierkante millimeter.
 
Dank Ron, ik vind het een kick om te zien dat wat ik in theorie had uitgedokterd, ook eens gewoon kan werken in de praktijk. Dat is lang niet altijd het geval, zoals de volgers van mijn topics bekend :D En dan is het niet erg om op de vierkante millimeter te werken, wat inderdaad letterlijk gebeurt. Bijna alle 25 onderdeeltjes van zo'n kanonnetje komen op een gebied van 5x5 millimeter te zitten.


Samenvatting van het onderstaande:

sectie 1 van het stappenplan wordt afgewerkt: de kanonnetjes komen in de basis op de platforms te staan. Als deze stappen zijn afgerond, wordt het een kwestie van toevoegen van details.

De 24 loopjes zijn klaar, de bases eveneens en zitten vast in de aluminium platforms (6 per stuk). Nu moet er nog een stukje wit plastic op maat worden gesneden, er moet een inkerving in worden gemaakt en dat moet tussen loop en basis worden gevoegd. De loopjes moeten 'perfect' horizontaal staan, evenwijdig aan de vloer, dus er moet veel worden gedryfit. Om elk kanonnetje dezelfde hoogte te geven, wordt gebruik gemaakt van één mal om de loop op te steunen. Met een droogtijd van een uur per kanon kost dit een hoop tijd, maar het resultaat is er naar.


Voor de geïnteresseerden heb ik de oorspronkelijke Engelse teksten bij de foto's laten staan. Heb je ergens een vraag over, schroom niet hem te stellen! Voor een toelichting waarom ik dit topic in het Engels schrijf, zie hier.

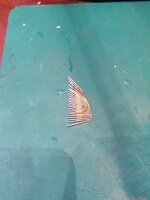
235. Plastruct are a life-saver in this. #90740 (0.40"/1.00mm square rod) virtually equal the gun's waist measurements. Zvezda wrongly made the waist circular. First thing to do is to level the top of the strip.

21029671282_b1188e7da4_c.jpg

236. Then, in the middle of the strip head, a cut is made.

20852815679_41d3162bcd_c.jpg

237. Diagonally, cuts are made so that small triangles come off. Now there's a small ditch in the top of the strip.

21029679582_0f595ab961_c.jpg

238. Sawing into the ditch... progress has to be checked every few seconds. The cut has to be as straight as possible, seen from both sides.

21047231411_530da97e8d_c.jpg

239. Only if it isn't perfectly straight, a file can help. Usually this step is not necessary.

20851719628_4015188b10_c.jpg

240. The result.

20416970164_12dd21cc23_c.jpg

241. After fitting the barrel inside this plastic part and fitting the combo to the gun's base, the smallest slice of plastic is scraped off with a new hobby knife. Sanding isn't easy on this material, this solution works fine. But one has to be careful not to go too far!

In reality I hold the plastic by pushing on it with a transparent piece of thick plastic.

21013377646_0ae2cee957_c.jpg

242. A part of a drop of Gator Glue is applied to the connection point.

20851717908_5fcd2bc2c0_c.jpg

243. The plastic is added...

20852817399_5e8c1f19f4_c.jpg

244. ... and, after careful alignment (and a recheck after 10 minutes) left to dry for about an hour.

20416972564_10c693443c_c.jpg

245. After that, once more a dry-fit is done to see the barrel is still parallel to the aluminium platform. Just to be sure. And then the barrel construction is glued onto the base. A piece of Lego helps in the aligning work, vertically as well as horizontally. Note the jig I built from Evergreen square rod. Using only one jig for each of the 24 guns serves as insurance for optimum similarity but it comes with the price of slowness.

20851500170_4a88e74e58_c.jpg

246. The difference between Zvezda's part and the scratched specimen thus far is mainly in length and thickness of the barrel.

20851508680_d4bc98d552_c.jpg
20418557873_b38319d405_c.jpg
20418558403_254779c3b1_c.jpg

247. One platform, 6 guns, finished:

20416977244_8d46be1d35_c.jpg
21013388616_272f3a2cac_c.jpg

Workflow:

1) Hollow "the ditch" and cut of plastic for gun #3.
2) Measure and cut to length gun #3 when jig is available (gun #1 has dried).
3) Glue plastic to barrel for gun #3.
4) Glue barrel construction to base for gun #2.
5) During drying time, go on with 1), where each # goes '+1'.

At this point in time 10 guns have been 'section 1-finalized'.

Spent time thus far: 180 h.
 
Samenvatting van het onderstaande:

Onderdeel 1 van het stappenplan is volledig klaar. Dat viel niet tegen, moet ik zeggen. Soms denk je dat iets heel snel zal gaan en duurt het in werkelijkheid eeuwen, hier is sprake van het omgekeerde. Ik heb een foto en een filmpje gepost plus een aangepast stappenplan.


Voor de geïnteresseerden heb ik de oorspronkelijke Engelse teksten bij de foto's laten staan. Heb je ergens een vraag over, schroom niet hem te stellen! Voor een toelichting waarom ik dit topic in het Engels schrijf, zie hier.

235. Section 1 was finalized for all 24 guns. I thought this was going to be a very long work but all in all it turned out to be not as much drama as I had expected. Here they are:

20977312648_39f49498f9_c.jpg

236. Checking for flaws in alignment, I always screen the barrels upwards and downwards (seen from the side). The following short vid shows what it now looks like (take into account that some platforms are slightly higher than others and one is slightly sloped):

https://flic.kr/p/yfiNLg

Those guns having a green exclamation mark will be put on top of the main gun turrets. They are connected with the main guns and will therefore look quite different.

237. On with the remainder of the guns. The corrected and updated schedule:

SECTION 1: BASE
1a. Cut off barrel aft (part '22').
1b. File barrel male connector (part '21').
1c. Glue barrel parts together (part '21' and part '22').
2a. Make, file and straighten recoil spring box (part '23').
2b. Glue recoil spring box to barrel.
3a. Drill holes in aluminum base.
3b. Chop off top half of plastic (part '20').
3c. Glue plastic base ('20') into aluminum base, using fin as reference for front/aft.
3d. Remove fin from base (part '20).
4a. Cut and saw recess for recoil spring box from square plastic strip (part '25').
4b. Cut off square plastic strip (part '25').
4c. Fit and correct height of part '25'.
4d. Glue part '25' to base ('20').
4e. Glue barrel subassembly to '25'.


SECTION 2: RECOIL SHIELDS
5a. Left side gun recoil shield: cut.
5b. Left side gun recoil shield: curve and add.
6a. Right side gun recoil shield: cut rectangle (see #163).
6b. Curve rectangle and add to gun (see #163-#166).

SECTION 3: SIDE EXTENSIONS
7. Make training rack using 'eyebrow method' and add.
8a. Cut left side rectangle (#168 ). Only for first 14 guns!
8b. Fold left side rectangle (Z-structure) and add (#168 ). Only for first 14 guns!
9a. Cut U-structure right side.
9b. Fold U-structure right side (#172).
9c. Cut and bend photoetched layer wheel right side.
9d. Add layer wheel.

SECTION 4: WIRING
10. Add left side layer's shoulder rest (copper wire).
11. Add right side trainer's shoulder rest (copper wire).
12. Add 2,26mm. copper wire (rod) to right side.
13a. Add part 1 wiring to gun (starting left back side) (See #175) (only for first 14 guns, others receive other wiring).
13b. Add part 2 wiring to gun (only for first 14 guns, others receive other wiring).

SECTION 5: SIGHTING GEAR
14a. Cut to shape photo etch sighting gear standard (see #157).
14b. Bend photo etch sighting gear standard (see #157).
14c. Using a jig like in #158, add two sighting gears made from copper wire.
14d. Add sighting gear to gun.
15. Make and add sighting gear wheel (see #159).

SECTION 6: ELEVATION
DEPENDING ON 12 POUNDER GUN POSITION ON THE SHIP, EITHER MAKE LEFT SIDE 12 INCH GUN CONNECTION (VERSION B ), OR MAKE VERSION A:
16a. Cut rod for left side elevator wheel.
16b. Bend photoetched elevator wheel.
16c. Glue rod to elevator wheel.
16d. Add elevator wheel to Z-structure.

238. The updated plan:

21139555586_628edc0810_c.jpg

239. The updated parts list:

20978965869_2b1571f22b_c.jpg

Spent time thus far: 186 h.
 
Ik doe het je niet na man.. :wacko:

Schitterend om te zien hoe alles tot in de kleinste details en juiste afmetingen tot stand komt.:wow:
 
Dank je wel :) Ik moet zeggen dat, hoewel het allemaal vrij traag gaat, ik er ook wel erg veel plezier aan beleef om zo te priegelen. Zeker voor iemand die 1/32 gewend is.
 
Vrij traag......geloof ik best op zo'n schaal ( zo klein :P ) ,en zie ik dat je toch flink wat werk hebt verzet ! Fijn en puik werkje , die Guns :)

En ook, er komt veel meet en paswerk aan te pas ;)
 

Users who are viewing this thread

Terug
Bovenaan